
Bookly – The Book App
The app that helps you find books and review them
Role
App Developer
Project Manager
Client
Self-created
Self-directed
Tools
SwiftUI
Xcode
Date
Spring 2023
The goal
For this final project, my goal was to create an application with Xcode and SwiftUI that would enhance my app development skills and push me beyond what I had learned in class throughout the semester. The result is Bookly — an application that allows you to browse through different books, purchase them, and review them.

Tinder-like UI || Book List with description and link for purchase || Review Page
The Challenge
My main priority for this application was to implement a modern user interface, both intuitive and aesthetically pleasing. In addition, I wanted it to have useful and fun features to improve user experience. Finally and most importantly, I strived for this application to have permanent storage, so that when the app is refreshed, whatever changes were made by the user (like favoring a book or adding a review) stay on the app.
The Solution
Even though my application still needs some improvements, I was able to accomplish my desired goals. Developing it was challenging since many of the things I was trying to achieve were ones I hadn’t learned or practiced before. I constantly ran into errors with my code, so I had to get creative to problem-solve. Below, I am going to break down a few of the application’s aspects, the problems that I came across with each one, and the approach I took to work them out.
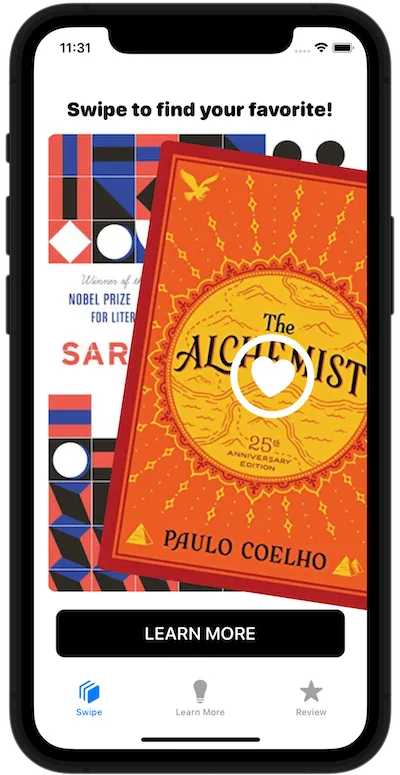
Tinder-like UI
I chose to use the popular Tinder-like user interface because it has a modern look, it is commonly used in apps, and it is fun! You can swipe left or right on each book for the next one to pop up.
Creating this user interface was the first thing I did for this project. To develop it I used animations, which we had previously covered in class, and gestures, which I had no idea how to do. I followed a tutorial in the book “Mastering SwiftUI” by Simon NG to understand how gestures worked and how to stack each of my card views on top of one another so they could be swiped, thrown out, and a new one would come up to the top.
Note: Swiping the books left or right doesn’t have further functionality. It is currently a visual feature so users can swipe through and see if any book catches their eye. However, for future iterations, it would be ideal for it to be functional.
Learn More View — Book List
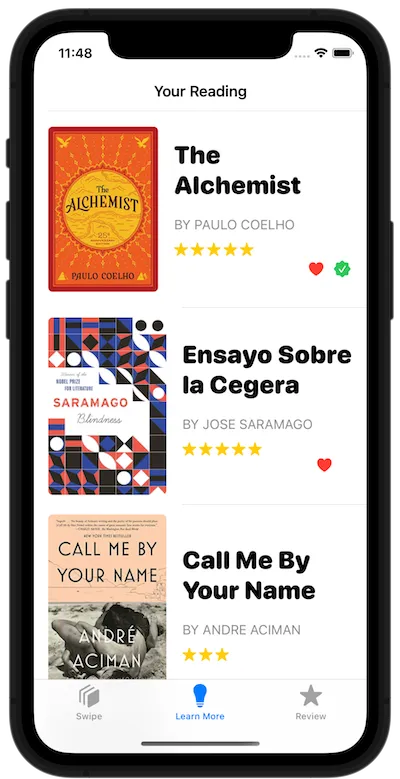
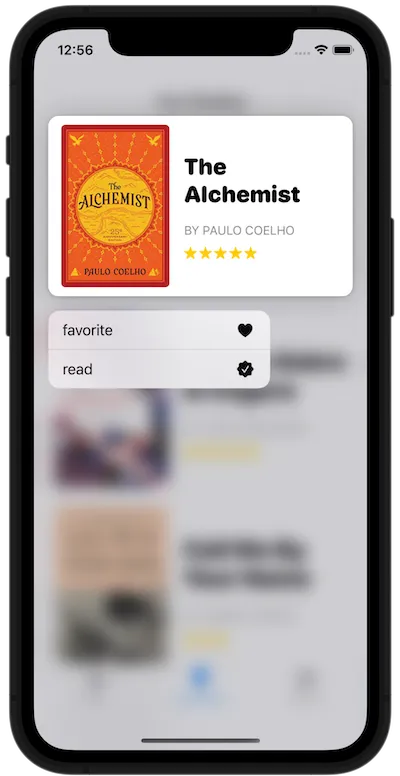
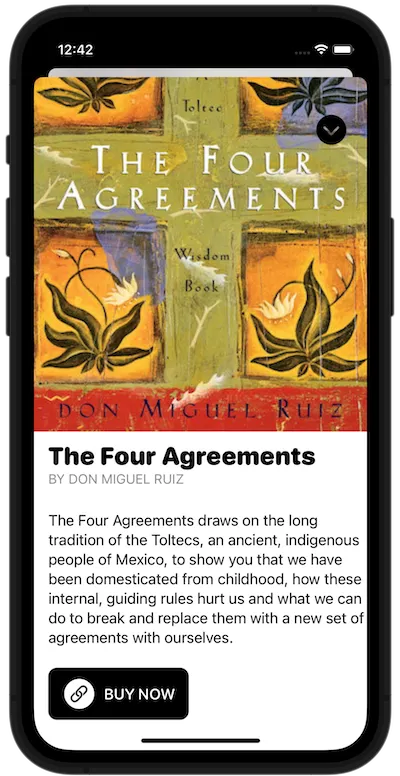
List of Books || Context Menu || Detailed View with external link
Creating lists with modal views, as shown above, is something I have had a lot of practice with throughout the semester. I created this view by developing variables, declaring them in a data set, and then using them to design the list items and the detail view.
In this view, I experimented with including external links that vary depending on the list item/book, so that when the “BUY NOW” button is pressed it takes you to purchase that specific book. It was fairly easy and worked perfectly. I just had to add an additional variable, declare each link in my data set, and create a link with the variable’s name as URL destination.
Something I struggled with in this view was the context menu. When a list item is pressed down, a context menu pops up and you can add a “favorite” or “checkmark” icon to the book. This feature was working perfectly fine on another application, but when I transferred the code over to this one a million errors came up. Even when I managed to solve all of the errors and the context menu was appearing, the icons weren’t. To solve this issue I had to rearrange my entire data set. I originally had all of my data in an external file, but had to copy it into the Learn More view and change its name for the context menu to work. Which ultimately meant I had two different data sets with identical data — one internal and one external. I couldn’t delete the external one because my Tinder-like UI was relying on it.
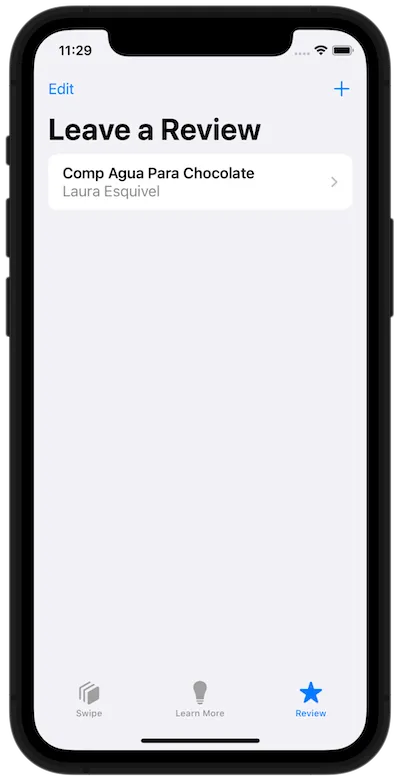
Review View using Core Data
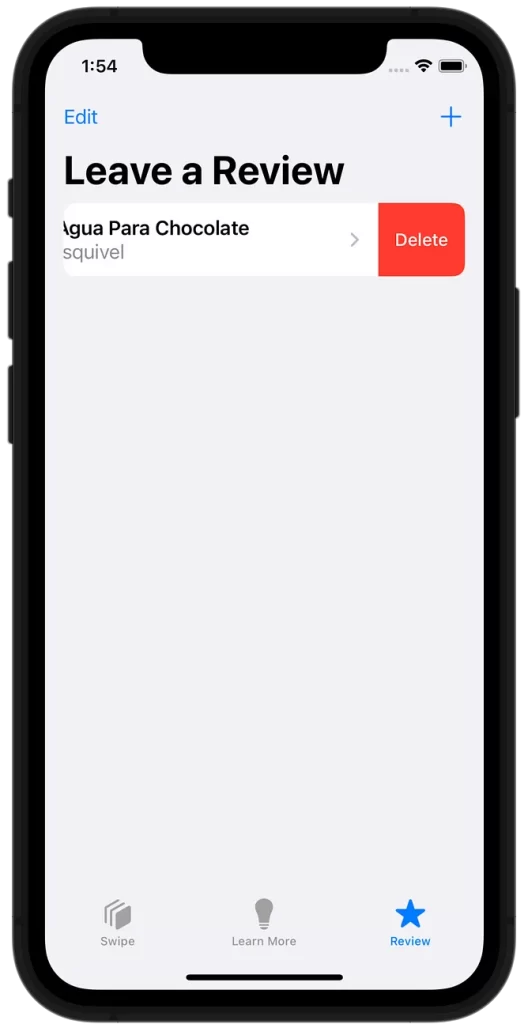
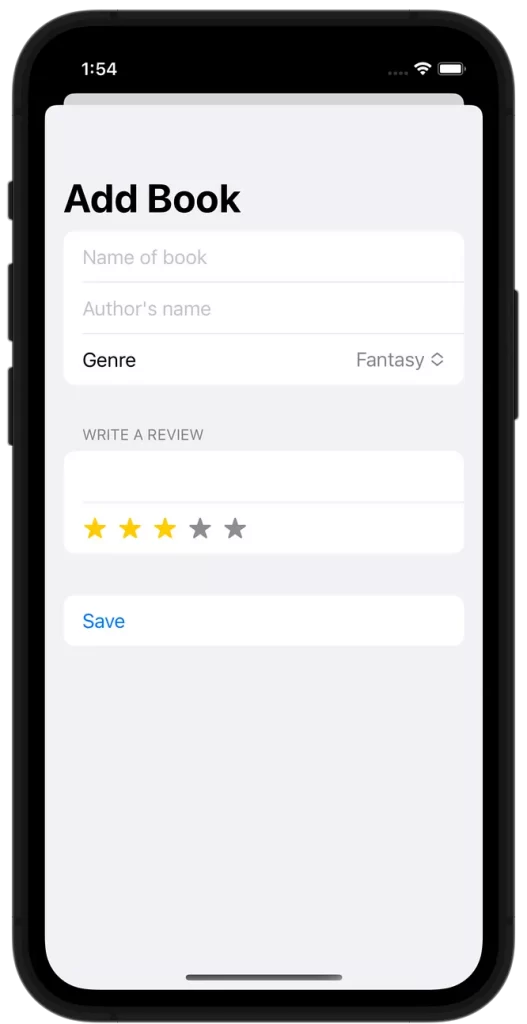
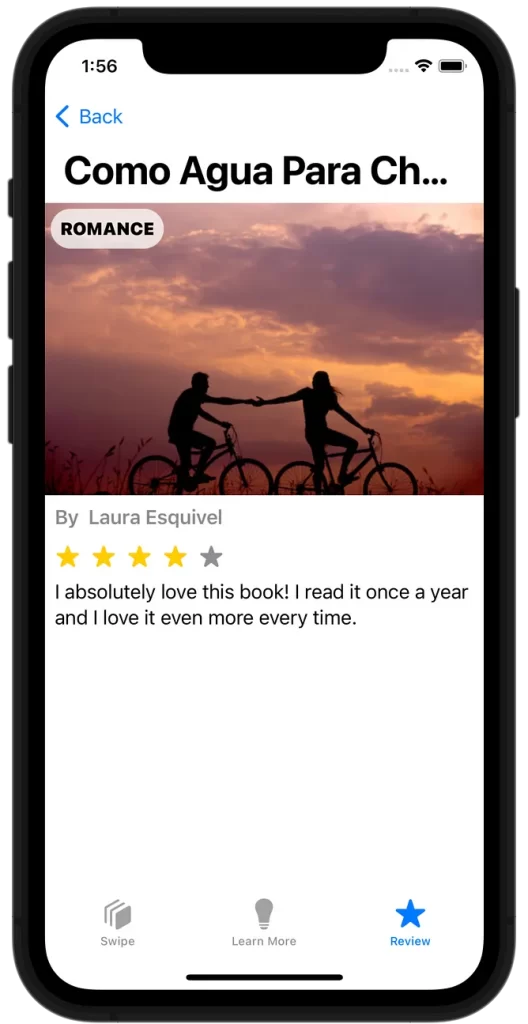
For this view, I used core data so that when a review is created it stays in the application when it is refreshed. Core data is incredibly powerful and what I created using it is only a small sliver of what it can do. I had never worked with core data before so I had to do some research to understand how it worked and how to implement it. I ended up finding this tutorial, which I followed to create this functional view.
In addition, depending on the genre that is picked when the review is created the image that is displayed changes.
Future Iterations
It is clear that this application still needs some functionality features for it to make it to the app store. Some aspects I would like to improve in future iterations are:
- Functionality in the Tinder-like UI. Ideally, for an action to occur when the user swipes right on the book. I did attempt to implement the appearance of a detail view when the book is clicked, but I wasn’t capable of figuring out how to do it while still keeping the swiping UI.
- Right now my entire app consists of data sets that I created by hand. For this app to be truly functional, it needs to be connected to an API that provides unlimited books that change each time the user refreshes the application.
- Ideally, this app would also serve as a social platform where you can view other people’s reviews of the book.
- In terms of the formatting of the code, I would like for it to be more concise. I currently have a lot of different data sets and more views than necessary. In my opinion, this is what I had to do for everything to be functional. However, I am certain that if I continue to learn the language, I can figure out ways to cut down the code and have a single external file with all of my data.
The main lesson I learned while creating this project is that when a problem arises, if I put effort into understanding the code and the problem, then use trial and error to test out different approaches and take a step back from the project when I have been working on it for too long, I will always figure out the solution.